

Master the Delta Force best weapons across Havoc Warfare and Hazard Operations with data-backed builds, TTK breakpoints, and Gunsmith calibration codes.
Losing a straight gunfight when you fired first is maddening. In Delta Force, gunskill only carries you halfway. Slap random attachments onto a baseline receiver, and horizontal shake combined with harsh damage drop-offs will tear your hit probability apart past 35 meters.
Delta Force separates weapon balance completely between Warfare and Hazard Operations. A laser-accurate assault rifle tuned for 64-player point defense will bankrupt your stash or bounce off level 5 armor plates in an extraction raid. Season 11 Reorientation shuffled the deck, nerfing longstanding staples while boosting precision setups. Here is how primary weapons perform right now, backed by damage numbers, range bands, and modification codes.

Garena Delta Force MENA
Understanding the Mode Split: Warfare vs Hazard Operations
Warfare and Operations run on completely isolated damage values, effective range brackets, attachment penalties, and recoil tuning. You cannot port a build from one mode directly into the other without paying a tactical penalty.
In Warfare, engagement volumes dictate weapon utility. You face constant waves of infantry across capture points, making ammunition capacity and continuous velocity paramount. Guns like the SVCH marksman rifle received ammunition reserve boosts from 60 rounds up to 180 rounds specifically to sustain lane suppression without frequent ammo crate runs. Drop-off bands are also widened, letting rapid-fire rifles contest open fields.
Hazard Operations runs on strict resource scarcity. Time-to-kill hinges on ammo penetration tiers against armor vests, while missed shots waste physical inventory. In Operations, moving while aiming down sights on sniper rifles introduces heavy spread penalties from Season 11. Strafing while looking through high-magnification glass throws your shot off-target. You must stop completely before firing.
Delta Force Weapon Tier List: Season 11 Meta Overview
The Season 11 Reorientation update altered several primary weapon hierarchies. The table below outlines how primary platforms rank across both playstyles based on damage efficiency, handling trade-offs, and economy.
| Weapon | Class | Warfare Tier | Operations Tier | Primary Role |
|---|---|---|---|---|
| M4A1 | Assault Rifle | S+ | S+ | Universal Mid-Range Precision |
| SG552 | Assault Rifle | S+ | A | High-RPM Lane Aggression |
| CI-19 | Assault Rifle | A | S+ | Cost-Effective Armor Shredder |
| K437 | Assault Rifle | S | S+ | Long-Range Armor Punch |
| CAR-15 | Carbine | S+ / B* | S | Low-Cost Zero-Investment Workhorse |
| MK4 | Submachine Gun | A | S+ | Close-Quarter Penetration Specialist |
| SMG-45 | Submachine Gun | S | A | Mobile Point Defense and Flanking |
| M250 | Light Machine Gun | A | B | Stationary Zone Lockdown |
| RM277 | Battle Rifle | A | S+ | High-Caliber Armored Target Elimination |
| M7 | Battle Rifle | B | B | Precision Tap-Fire Duels |
*The CAR-15 remains disputed: competitive tournament rosters rank its predictable base recoil at S+ for zero economic risk, while public tier lists place it in B-tier due to lower burst damage against level 5 and 6 vest plates.
Use this distribution to budget your Tekniq Alloy. Sinking rare modification resources into lower-tier platforms wastes currency when S+ options easily cover both modes.
Dominating Mid-Range: Delta Force Best Assault Rifle Choices
Assault rifles dictate fights between 20 and 50 meters. If your rifle cannot drop a target within that band before they reach hard cover, swap your attachments.
M4A1: The Undisputed King of Consistency
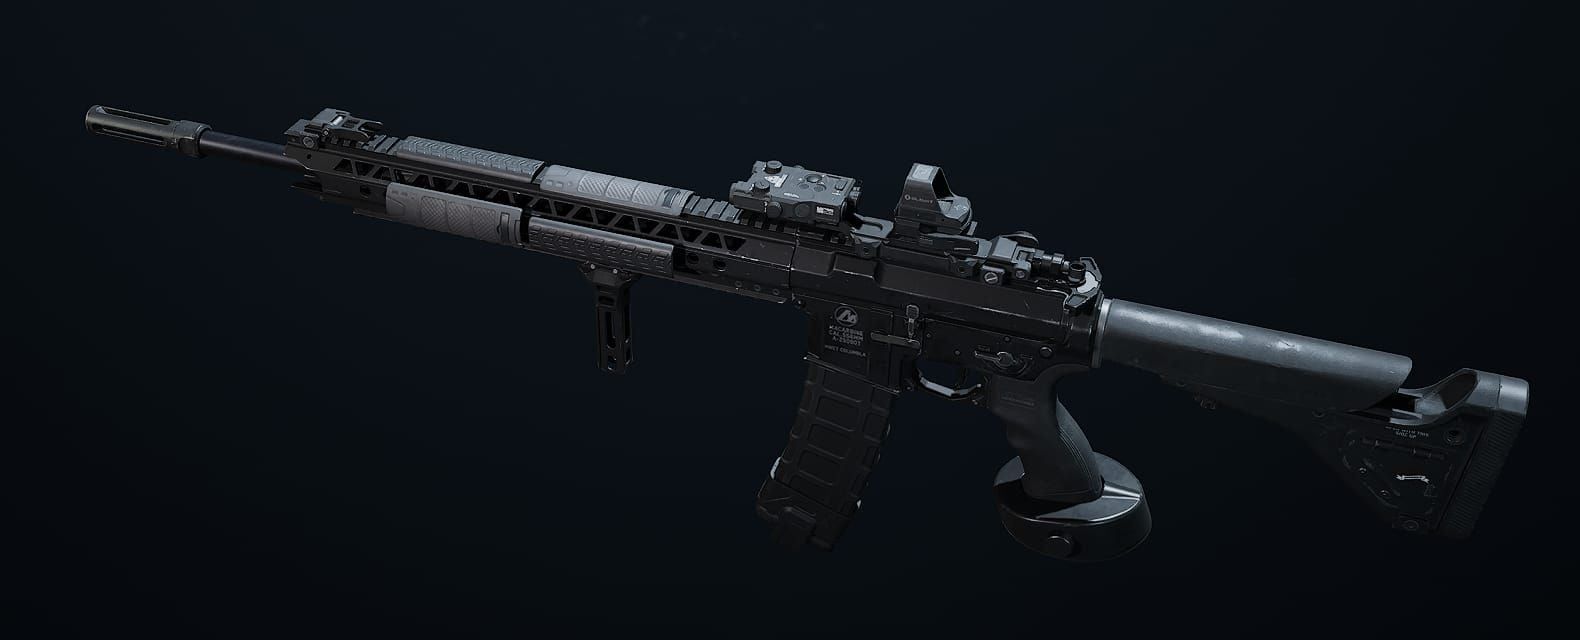
The M4A1 took over the assault class after a base damage buff pushed its hit profile from 29 to 31. That two-point jump reshaped mid-range duels up to 40 meters. Community tests disagree on whether its true rate of fire sits at 672 RPM or hits 800 RPM, but its practical lethality in live 2026 matches is clear.
Configure the M4A1 for stability rather than sprint-to-fire speed. Equipping the Sandstorm Vertical Compensator, AR Gabriel Long Barrel Combo, and Secret Order Bevel Foregrip pushes Control to 72 and Stability to 68. Handling falls to 41, but the trade-off removes erratic horizontal drift, letting you hold full-auto beams through smoke.
SG552: High-RPM Warfare Dominance
At 906 RPM, the SG552 melts targets before flinch animations conclude. The rifle received Warfare damage range expansions, stretching its falloff brackets from the original 40m/50m/70m/90m boundaries out to 50m/60m/70m/90m.
Those extra 10 meters of maximum base damage make the SG552 an oppressive lane-clearing tool in Warfare. In Hazard Operations, however, that cyclic rate burns through expensive high-tier magazines in fractions of a second.
K437: Heavy Long-Barrel Punch
Adjustments to specialty barrels pushed the K437 into the meta. Season 11 upgraded the K437 Lancer Long Barrel, boosting bullet velocity, range brackets, and penetration against heavy vests in Operations. It delivers heavy-rifle stopping power from elevated ridgelines without the wild recoil climb of battle rifles.
CAR-15: The Zero-Cost Legend
Available to all classes by default and chambered in standard 5.56x45mm, the CAR-15 costs nothing to deploy. Vertical kick climbs in a tight, predictable line. In extraction matches where full kits are on the line, a lightly modded CAR-15 lets you contest geared operators without risking your bank balance.
If you need cosmetics or tactical passes for your squad, grabbing Garena Delta Force credits provides direct account access without regional payment issues.
Hazard Operations Meta Weapons for High-Stakes Extraction
Extraction raids punish wasteful expenditure. Winning an Operations duel means balancing raw time-to-kill against ammunition price and kit repair fees.
CI-19: The High-Value Extraction S-Tier
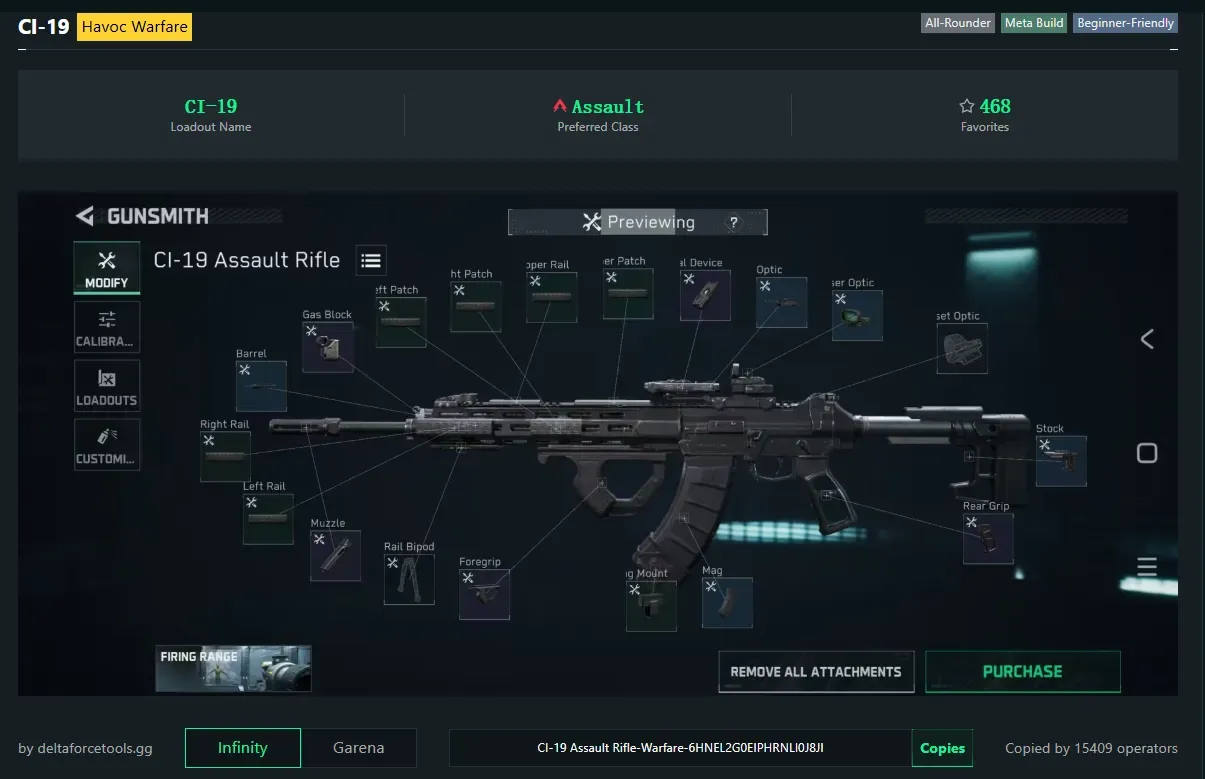
The CI-19 is currently the most practical assault rifle in Operations. While the M4A1 requires expensive components to calm its drift, the CI-19 delivers steady recoil, stable damage, and fast handling right off the workbench. It yields high DPS per unit of Tekniq Alloy spent, making it an ideal primary for solo extraction runs.
RM277: High Caliber, Brutal Economy
Chambered in 6.8x51mm, the RM277 chews through heavy armor faster than almost any automatic in the game. Ammunition selection determines your profit margin:
- PLY-I Ammunition: Level 3 penetration for clearing standard patrol AI and budget scavengers.
- PLY-II Ammunition: Level 4 penetration for hunting mid-tier operator squads.
- PLY-III Ammunition: Level 5 penetration featuring a 0.9x armor penetration multiplier for elite stronghold targets.
PLY-III rounds make every mag dump an economic liability. Missed bursts hurt worse than losing the rifle. Save the RM277 for coordinated three-stack raids where team revives safeguard your loadout.
MK4: Close-Quarters Armor Piercing
Submachine guns usually struggle against ceramic chest plates, but specialized barrels solve that for the MK4. The MK4 Fencer Barrel pushes base armor penetration from 30 to 35. Alternatively, the Deep Space Chrome Barrel raises damage from 32 to 34 while lifting penetration from 27 to 30, shredding players in underground stairwells and bunker corridors.
Calibrated Meta Loadouts and Gunsmith Import Codes
Gunsmith import strings copy complete weapon modifications instantly. The table below lists calibrated builds with part selections, alloy costs, and exact share codes.
| Weapon Build | Build Focus | Key Components | Modification Cost | Gunsmith Import Code |
|---|---|---|---|---|
| M4A1 Meta Recoil | Vertical Control & Stability | Sandstorm Comp, Gabriel Long Barrel, 45-Rnd Mag | 440,000 Tekniq Alloy | 6JQOV8K06F3769TRGAG41 |
| CI-19 Competitive | Economy Extraction DPS | Factory Compensator, Bevel Grip, Extended Mag | 600,000 Tekniq Alloy | 6KIBSS806F3769TRGAG41 |
| SG552 Stealth Assault | Suppressed Flank & Velocity | Silent Suppressor, Heavy Barrel, 30-Rnd Mag | 350,000 Tekniq Alloy | 6EQRRG004IRCV4UQ6PCEV |
| K437 Long Range | Maximum Velocity & Penetration | Lancer Long Barrel, Heavy Stock, 40-Rnd Mag | 900,000 Tekniq Alloy | 6L83DNK06F3769TRGAG41 |
| SMG-45 Objective | Rapid ADS & Point Control | Sandstorm Comp, Fission Long Barrel, Tactical Grip | 250,000 Tekniq Alloy | 6JQOUMK06F3769TRGAG41 |
| CAR-15 Budget Runner | Zero-Cost Baseline Farming | Standard Muzzle Brake, Basic Handguard | Free / Base Setup | 6JQ9DTC02N2NQGF6IHVGC |
These configurations cover distinct engagement roles. The M4A1 and K437 hold open terrain, whereas the SMG-45 and CI-19 handle close-quarters room clears.
Recoil Calibration Hacks: Taming Visual Bounce and Spread
A build showing 70+ Control can still feel like it kicks wildly. That disconnect comes down to visual screen shake rather than mechanical shot spread.
Calibrate individual part offsets in the Gunsmith interface using these adjustments:
- Shift Eye Relief Forward: Push the optic eye relief setting into positive values. Moving the optic forward down the top rail reduces perceived screen recoil by 10 to 15 percent. The optic view shrinks slightly, but visual shake drops enough to track sprinting targets cleanly.
- Mount Heavy Barrels for Range Breakpoints: Long heavy barrels cut handling speed by roughly 8 percent while pushing damage drop-offs out to 55 meters. That prevents your shots from falling into lower damage brackets during mid-range fights.
- Combine Bevel Grips with Compensators: Avoid stacking multiple vertical muzzle devices if horizontal stability sits under 50. Pairing a Sandstorm Vertical Compensator with a Secret Order Bevel Foregrip stabilizes both axes, converting diagonal jerk into vertical climb.
To fund these expensive attachments before dropping into high-tier zones, use a Garena Delta Force top up to keep your Tekniq Alloy reserves stocked.
Battle Rifles and Support Guns: Nerfs, Ammo, and Stat Shifts
Recent balance patches reshuffled heavier weapon classes, stripping away run-and-gun potential in favor of strict positioning.
| Weapon | Previous State | Current State (Season 11) | Tactical Impact |
|---|---|---|---|
| M7 Battle Rifle | 38 Base Damage, 0.40 Limb Multiplier | 37 Base Damage, 0.35 Limb Multiplier | No longer guarantees easy 4-shot kills; rewards only upper-chest hits. |
| M250 LMG | 45 Base Control, Moderate Mobile Spread | 40 Base Control, Heavy Mobile Spread Penalty | Mobile firing heavily penalized; restricted to stationary bipod lane lockdown. |
| SCAR-H | 0.4x Limb Multiplier | 0.5x Limb Multiplier | Greatly improved shot consistency in Operations when hitting moving limbs. |
| SVCH Marksman | 60-Round Reserve Ammunition | 180-Round Reserve Ammunition | Drastically enhances sustained Warfare sniper counter-fire without resupply. |
The M7 suffered the harshest drop. Its base damage fell to 37, its limb multiplier dropped to 0.35, and the Tidal Ultra-Long Barrel now deals 39 damage instead of 40. Off-target hits get punished immediately.
The M250 also lost mobile viability. With base control down to 40 and heavy bloom applied while walking, corner-pushing with an LMG is dead. Anchor behind cover, drop the bipod, and lock down lanes instead.
Whenever you run low on alloy or lose key loadouts during extraction streaks, use the Garena Delta Force store to restock supplies for your next deployment.
FAQ
What is the best all-around weapon for Warfare in 2026?
The M4A1 is the best all-around Warfare weapon following damage buffs to 31 and superior recoil control. The SG552 also excels due to its expanded Warfare range profile and rapid 906 RPM fire rate.
Which weapon offers the highest value in Hazard Operations extraction?
The CI-19 is the best value extraction weapon because it provides top-tier DPS and controllable recoil without requiring an expensive attachment stack. For low budgets, the CAR-15 and SMG-45 remain optimal cost-effective choices.
Why do my Warfare weapon builds feel worse in Operations mode?
Delta Force uses mode-specific weapon balancing that applies different damage numbers, range falloffs, and recoil curves between Warfare and Operations. You must calibrate attachments specifically for each mode.
How did Season 11 change the sniper rifle meta?
Season 11 Reorientation added heavy shot spread penalties while moving and aiming with sniper rifles in Operations. Snipers must remain completely stationary to maintain pinpoint shot accuracy.
Is the M7 battle rifle still the strongest weapon in the game?
The M7 is no longer undisputed after multiple balance nerfs reduced its base damage to 37 and lowered its limb multiplier to 0.35. It remains powerful for skilled marksmen but requires tighter recoil compensation.
How can I reduce visual reticle bounce on automatic weapons?
Adjust the optic eye relief slider toward the positive setting in Gunsmith to reduce perceived visual recoil by 10 to 15 percent. Pairing this with a muzzle brake and bevel foregrip further stabilizes reticle jump.
What makes the K437 a top-tier assault rifle pick this season?
The K437 received direct improvements to its Lancer Long Barrel in Season 11, raising muzzle velocity, range, and armor penetration. This makes it lethal against high-tier body armor in competitive Operations.
Final Gunsmith Verdict: Where to Invest Right Now
Invest Tekniq Alloy into the M4A1 and CI-19 first. The M4A1 delivers a dependable, low-recoil platform for 40-meter duels across both modes. For Operations extraction, the CI-19 provides unmatched performance relative to its modification price.
Avoid spending heavily on the M7 or mobile M250 builds until you can reliably hold stationary sightlines. Offset your eye relief sliders, keep fights within your barrel's optimal range, and run calibrated builds to stay ahead.

Community
Comments