

Master the fastest AoV jungle farm route 2026 to hit level 4 under 90 seconds, secure early gold leads, and dominate the first Abyssal Dragon spawn.
Bad pathing ruins games before they start. Showing up late to the river at level 3 while the opposing assassin hits level 4 with an active ultimate puts your team on the back foot immediately. Reaching level 4 before the two-minute mark is the absolute standard for early tempo.
A sharp clear path dictates who controls the Abyssal Dragon, which side lane takes tower damage, and how fast your team builds a gold lead.

Arena of Valor (ID) Vouchers
- -3%
40 Vouchers
Buy NowUSD 0.66
USD 0.68
- -3%
90 Vouchers
Buy NowUSD 1.32
USD 1.36
- -3%
230 Vouchers
Buy NowUSD 3.28
USD 3.38
- -3%
470 Vouchers
Buy NowUSD 6.57
USD 6.77
- -3%
950 Vouchers
Buy NowUSD 13.13
USD 13.53
- -3%
1430 Vouchers
Buy NowUSD 19.71
USD 20.30
- -3%
2390 Vouchers
Buy NowUSD 32.85
USD 33.83
- -3%
4800 Vouchers
Buy NowUSD 65.70
USD 67.67
- -3%
24050 Vouchers
Buy NowUSD 328.52
USD 338.38
- -3%
48200 Vouchers
Buy NowUSD 657.05
USD 676.76
The 2026 Jungle Meta and Economy Shifts
Recent balance patches overhauled jungle pacing. The March 27, 2026 update modified jungle equipment and battlefield economy, pulling Astrid directly into viable jungle contention. Soon after, the June 26, 2026 update introduced core jungle balance adjustments alongside the hero Tamyn, shifting clear speeds across the board.
Western and English server deployments trail Taiwan and Vietnam servers by 7 to 14 days. Tracking match data from those regions gives you early warning on camp balance and hero adjustments.
If you want to unlock heroes like Astrid or grab new skins before testing new rotations, you can pick up Arena of Valor (ID) Vouchers to get what you need instantly.
Staying updated on these balance tweaks stops you from repeating outdated pathing habits that burn valuable seconds.
Monster Bounties and Scaling Formulas
To build an airtight jungle rotation, track exact monster payouts. Minor camps and primary buff golems award different returns, and their values increase dynamically as the match progresses.
Neutral camp gold increases by 1% every 30 seconds during the opening two minutes. That growth rate ramps up to 4.5% at the 8-minute mark, reaching a hard ceiling of 165% bonus gold after minute 11. Neutral monsters also gain 3% bonus EXP every 30 seconds during your first clear, jumping to 10% per interval at 8 minutes, and capping at 240% after 11 minutes.
| Camp Name | Base Gold | Early Scaling (First 2 Min) | Strategic Benefit |
|---|---|---|---|
| Sage Golem (Blue) | 65 | +1% Gold / +3% EXP per 30s | Grants mana regeneration and cooldown reduction |
| Might Golem (Red) | 65 | +1% Gold / +3% EXP per 30s | Adds burn damage and auto-attack slow |
| Minor Camps (Toad, Lizard, Monkey, Crab) | 55 each | +1% Gold / +3% EXP per 30s | Core experience source to achieve level 4 power spike |
| Spirit Sentinel | 30 | Scales up to 54 gold at 10:00 | Grants 50 HP/s health regeneration and bonus movement speed |
| Abyssal Dragon | Up to 144 per player | Spawns at 2:00 sharp | Distributes teamwide gold and massive group experience |
Clearing camps right on spawn extracts maximum gold and experience scaling rather than letting value sit uncollected in the pit.
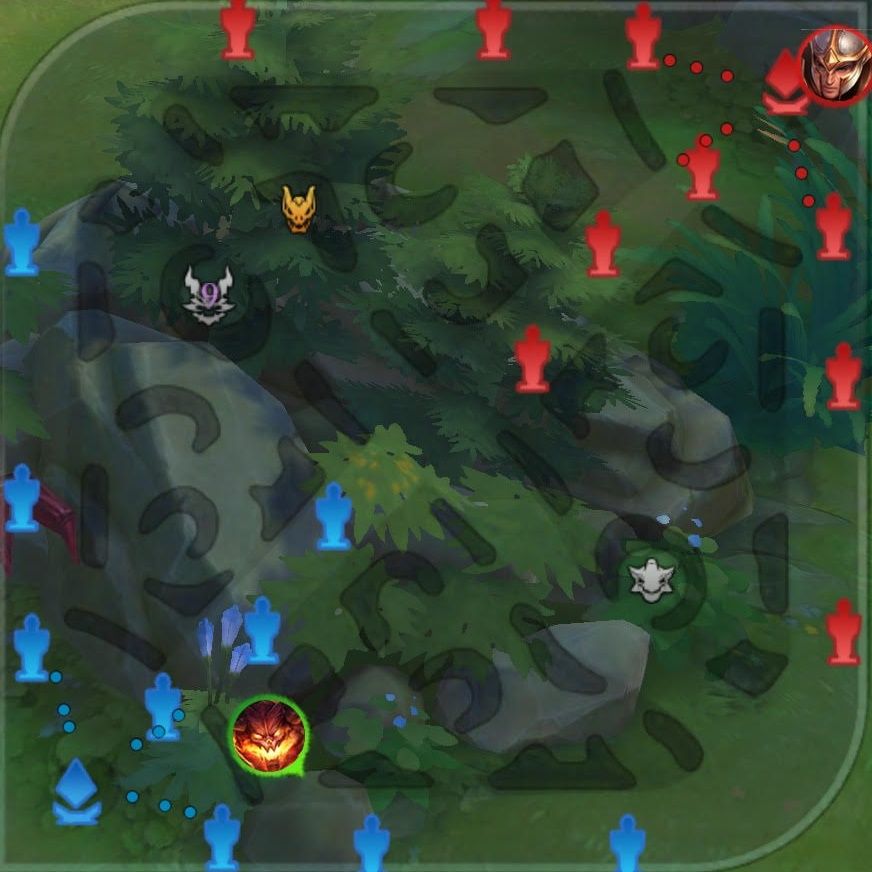
The Sub-90 Second Level 4 Pathing Schedule
Your opening rotation must run on a tight clock. A mistimed Punish or an awkward camp pull adds five seconds of delay, breaking your level 4 window. Here is the sequence to guarantee level 4 before the clock hits 1:30.
Camp 1: Might Golem or Sage Golem (0:30 - 0:45)
Stand at your starting buff at 0:25. If your hero burns mana quickly, open on Sage Golem. If you rely on basic attacks and burst damage, start on Might Golem. Pull the monster toward your next camp to shorten travel time. Use Punish immediately so the cooldown timer begins running right away.Camp 2: Adjacent Small Camp (0:45 - 0:58)
Slide to the minor camp directly beside your opening buff (Wild Monkey or Tree Toad). Kite the monster toward the river edge. Save mobility cooldowns to jump walls into the next sector.Camp 3: Secondary Small Camp on Starting Side (0:58 - 1:10)
Take the remaining minor monster on your starting side. You hit level 2 here and gain your second ability. Finish the camp with basic attacks and hold Punish if it comes off cooldown.Camp 4: Cross Mid Lane to Opposite Buff (1:10 - 1:22)
Cross through your inner mid turret territory. Never clear your mid laner's wave here; splitting EXP delays their level 2 spike. Engage your second primary buff golem and cast Punish the moment the monster enters execute range.Camp 5: Second Side Small Camp (1:22 - 1:32)
Clear the Luminous Lizard or Rock Crab near your second buff. Drag it toward the lane adjacent to the Abyssal Dragon pit. At this point, camp scaling pushes your experience pool over the level 4 threshold.Camp 6: River Crab / Gank Positioning (1:32 - 1:45)
Take the river crab if lane pressure allows, or slip into the river brush next to the dragon lane. You now hold your ultimate ability, full camp gold, and roughly 15 seconds to look for a pick before the Abyssal Dragon spawns.
Adapting to the Flipped Map Orientation
Dynamic perspective catches unprepared junglers off guard. Both teams view the battlefield from bottom-left to top-right on their screens. Consequently, the Abyssal Dragon pit alternates between top and bottom lane depending on which side you draw at match start.
Check your minimap during the load-in screen. Locate the Abyssal Dragon pit icon immediately: start on the buff opposite your intended gank lane.
If the dragon sits in the bottom lane, open your clear on the top-side buff. Pathing downward brings your fifth camp to the dragon lane right as you hit level 4. Starting on the same side leaves you stranded across the map on the Dark Slayer side at 1:40, handing dragon control straight to the enemy.
Finishing your path near your gank target sets up early eliminations. Clean ganks can crack the outer enemy tower by minute 4, securing massive map control.
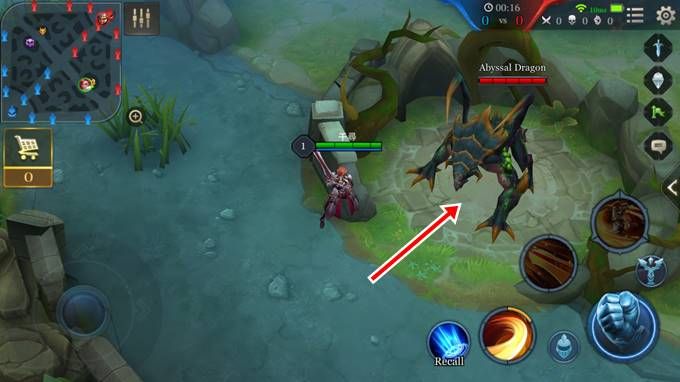
Early Kills vs Neutral Farm: The Risk Math
Chasing a river skirmish at level 2 is a statistical blunder. Arena of Valor's economy penalizes low-percentage fights and rewards predictable camp clears.
Hero kills between levels 1 and 3 yield 150 gold, with first blood adding a 75-gold bonus for 225 total. Your two starting buffs pay 65 base gold each, while small camps yield 55 base gold each. Clearing two small camps gives you 110 gold with zero risk of death or lost tempo.
| Action | Base Gold Reward | Risk Level | Impact on Clear Path |
|---|---|---|---|
| Small Camp Clear | 55 base gold | Zero | Keeps route running smoothly on schedule |
| Buff Golem Clear | 65 base gold | Very Low | Unlocks vital buffs and rapid mana/damage tempo |
| Early Kill (Levels 1-3) | 150 gold | High | Wastes 15-25 seconds; ruins level 4 timing if blown |
| Level 4 Gank Kill | 200 base gold | Moderate | High return when executed with ultimate ability ready |
| Minion Wave Last Hit | 40% bonus over passive | Low | Massive extra income when shoving post-gank |
At level 4, enemy kill bounties rise to 200 base gold. Bailing on your route to force an early gank that fails burns 20 seconds of jungle tempo and concedes the 2:00 dragon.
Unless an opponent walks directly into your camp with negligible health, stick to neutral camps until your ultimate is online.
If you struggle in hero matchups, optimize your arcana or test competitive picks like Batman or Astrid. Keeping Arena of Valor (ID) vouchers online ready gives you rapid access to roster additions when fresh patches drop.
Securing the 2:00 Abyssal Dragon and Objective Timers
At 2:00, the Abyssal Dragon spawns. Slaying it awards up to 144 gold per teammate alongside teamwide experience, frequently pushing your laners ahead by half an item.
Mind the monster's leash radius. Pulling the Abyssal Dragon outside its perimeter triggers a hard reset, restoring its full health bar instantly. Keep the beast centered in the pit while your support controls vision in the river brush.
Older guides claim the Dark Slayer spawns at 6:00 for a 30% attack damage buff. Current updates set the Dark Slayer spawn at 8:00, granting out-of-base altar health and mana regeneration alongside the Drake Mondester summon.
At 10:00, the monster evolves into the Enraged Abyssal Dragon, following a 5-minute respawn cycle (10:00, 15:00, and 20:00) that grants combat buffs based on hero class.
| Objective | Initial Spawn Time | Respawn Cooldown | Key Objective Reward |
|---|---|---|---|
| Spirit Sentinel | 1:50 | Variable | 30-54 gold per player, HP regen, and speed buff |
| Abyssal Dragon | 2:00 | 2 Minutes | Up to 144 gold per teammate and large group EXP |
| Dark Slayer | 8:00 | 5 Minutes | Altar regeneration and Drake Mondester summon |
| Enraged Abyssal Dragon | 10:00 | 5 Minutes | Role-based combat enhancements and Abyssal Stone |
The team securing the 2:00 dragon controls the match tempo for the next five minutes, which makes early clear discipline mandatory.

Best Junglers for Speed Clears in the Current Season
Clear speeds vary dramatically across the jungle roster. Executing an optimal route requires high single-target burst, low cooldowns, and reliable terrain mobility.
- Nakroth: The benchmark for clear speed. Nakroth hops jungle walls repeatedly, skipping terrain traversal entirely. He clears camp 5 ahead of almost every other assassin, giving him ample time to establish dragon pit vision.
- Batman: High single-target burst combined with stealth. Batman deletes buff golems quickly and deals heavy damage the moment he hits level 4. He invades aggressively whenever his lanes possess priority.
- Astrid: Revived in the jungle following the March 27 patch. Astrid brings durable stats, reliable cleave damage, and solid objective securing power. She absorbs monster damage cleanly during her first rotation.
Pairing fast junglers with proper camp kiting cuts clear times down to 80-85 seconds, allowing you to control river vision before the opposing jungler finishes their route.
Second Rotation and Lane Taxing Rules
Contesting the 2:00 dragon feeds directly into your second jungle cycle. Camps respawn roughly 90 seconds after defeat, meaning your starting buff reappears between 2:15 and 2:30.
If your gank nets a kill or forces a recall, crash the minion wave into the enemy tower. Last hitting lane minions grants a 40% bonus over passive ambient wave gold, significantly raising your gold per minute.
Never soak wave gold if your laner is returning from base unless the wave is actively hitting your tower. Stealing lane farm without applying map pressure starves your teammates and throws off lane parity.
Rotate directly from your tower shove into the Spirit Sentinel or straight back to your respawning camps. Maintaining this camp-gank-push-camp cadence preserves your gold advantage.
Competitive junglers tune arcana and talents to shave seconds off each clear. Using a top-up Arena of Valor (ID) Vouchers ensures your account maintains access to top-tier heroes and setups for ranked play.
FAQ
When does the first Abyssal Dragon spawn in Arena of Valor?
The Abyssal Dragon spawns at exactly 2:00 into the match. Completing a full clear of all neutral camps before this timestamp ensures your jungler reaches level 4 in time to contest it.
Which buff should I start on for an optimal farm route?
Start on the buff opposite to the Abyssal Dragon lane so your final camp deposits you right next to the pit at level 4. Might Golem is preferred for faster clear damage and slows, while Sage Golem suits mana-intensive heroes.
How much gold do standard jungle camps award in AoV?
Sage and Might Golems provide 65 base gold, while regular small camps award 55 base gold. Neutral camp gold increases by 1% every 30 seconds over the first two minutes.
What is the respawn timer of the Abyssal Dragon?
The Abyssal Dragon respawns 2 minutes after it is defeated. A countdown timer appears on the battlefield during the final 60 seconds before its return.
How does AoV's flipped map perspective affect jungle pathing?
The game flips player orientation so you always advance towards the top-right, meaning the Abyssal Dragon lane switches between top and bottom sides each game. Check your minimap at spawn to verify dragon pit positioning before choosing your starting buff.
Why is early ganking before level 4 risky for junglers?
Hero kills between levels 1 and 3 yield only 150 gold, which is less than clearing two standard jungle camps. Failing an early gank forfeits level 4 tempo and concedes the 2:00 Abyssal Dragon to the enemy team.
When does the Abyssal Dragon enter its Enraged state?
The Abyssal Dragon evolves into the Enraged Abyssal Dragon at the 10:00 mark. Slaying it grants role-specific combat bonuses and drops the protective Abyssal Stone.
Final Verdict: Route Discipline Decides the Match
Discipline wins games far more reliably than flashy plays. Forcing low-percentage skirmishes before level 4 gives up initiative and sacrifices objective control.
Start on the buff opposite the Abyssal Dragon, kite camps toward your next destination, and pop Punish on cooldown. Hitting level 4 by 1:30 gives you river priority, guarantees a contested 2:00 dragon fight, and dictates the pace of the match throughout 2026.

Community
Comments